
AppleBridge lets an AI agent — or you, from a shell — drive a real System 7 Macintosh running in Basilisk II: move files with both forks intact, take screenshots of the emulated screen, inject keystrokes and clicks, list directories, read volume information, and, if the guest has MPW, compile and link 68K software. This page is the installation, start to finish.
It takes about ten minutes and needs no compiler on the Mac.
What you need
On the macOS side
- Basilisk II with a guest that boots. SheepShaver works too, and so does a real 68K Macintosh over serial or MacTCP; this guide describes Basilisk II.
- Nothing else. The host side is Python standard library, so the
/usr/bin/python3that ships with macOS is enough and there is nothing to build. Verified on macOS 10.15 through current, Python 3.8.2 upward.
In the guest
System 7.5.3 or later with Open Transport (verified on 7.5.3, 7.6.1 and Mac OS 9). MacTCP works as well. (I could imagine, everything starting from 7.5 works.)
No compiler, and no MPW. MPW and ToolServer are optional. They add the command tier — running MPW commands, compiling, linking — and everything else works without them: screenshots, fork-aware file transfer, input injection, directory listings, clipboard, launch and shutdown. An absent ToolServer is a tier you do not have, not a broken install.
One thing worth checking before you start: how many network interfaces your
Mac has. If it has one — a laptop on Wi-Fi, typically — then slirp is the only
backend that can work, because a bridged backend cannot reach the machine it
runs inside. The guest would reach the entire internet except its own host. The
installer configures slirp and nothing else, so this is usually moot; it
matters if you are attached to an existing etherhelper setup.
Talking about etherhelper: I am usually always using it, but most users might not have etherhelper installed.
So I did focus on an installtion with slirp. For etherhelper I have seen frozen or 100% on load BAIIs.
That could be fixed with the TCPIP settings in BAII or SheepShaver. I’ll investigate.
1. Configure the host
git clone https://github.com/LoetLuemmel/AppleBridge.git
cd AppleBridge/host
./install_bridge.py --dry-run     # read the plan; it changes nothing
./install_bridge.py
The dry run is worth reading. It prints what it found — your emulator bundle, the current Ethernet backend, how many interfaces you have, whether an emulator is running — and then the plan, with a reason for each step.
The real run sets the emulator’s Ethernet backend to slirp, keeping a
timestamped backup of your preferences; writes host/local.env; installs a
launchd agent that keeps the host server running; and prints the guest-side
values. It asks for nothing and needs no password. That last part is the
practical difference between this backend and the alternative — etherhelper
needs two interactive password prompts per launch and so cannot start
unattended.
If it refuses, read what it says. It will not convert a host that is already
configured for etherhelper, because that is somebody’s working AppleTalk
setup and converting it costs the Chooser and AFP mounts. --force-slirp
overrides that, and on a single-interface machine you almost certainly want to.
2. Get the guest kit
Download AppleBridgeKit.dmg from the
latest release. It is a
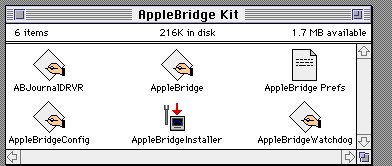
2 MB disk image holding four 68K applications, the journaling driver the daemon
opens by name, and a preferences file.
Add it to the emulator as a second disk. In ~/.basilisk_ii_prefs:
disk /path/to/AppleBridgeKit.dmg
Then relaunch the emulator — the disk list is read at launch only.
You do not have to configure an address. The kit ships IP=10.0.2.2, which
under slirp is a constant of the backend: the same on every machine, and it
reaches whichever host runs the emulator. slirp forwards it to that host’s
loopback, and the server hears it there because it binds every address.
Change it only if you run the bridge server on a different machine than the
emulator. Then the loopback is the wrong host, and only that machine’s own
address will do — set it in AppleBridgeConfig inside the guest, or with
install_bridge.py --seed-guest-prefs <kit.dmg> before you mount the kit. That
second route needs hfsutils, which macOS does not ship; the first does not.
3. In the guest
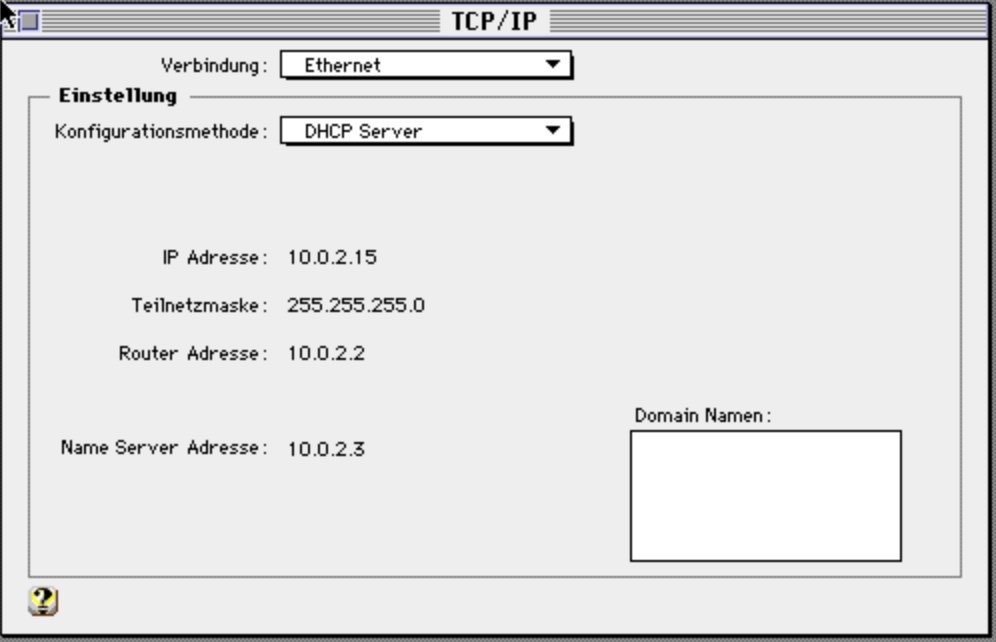
First, TCP/IP. This is the one step no host-side program can take for you: System 7 with Open Transport offers no scripting surface for that control panel. Apple menu → Control Panels → TCP/IP:
Connect via   Ethernet
Configure     Using DHCP Server
Type nothing else. slirp answers DHCP itself and supplies all four values,
including the name server — which is the field that gets left empty when the
values are entered by hand, and without it name resolution fails in a way that
looks like a routing fault. If your build does not answer DHCP, the values are
fixed: address 10.0.2.15, mask 255.255.255.0, router 10.0.2.2, name server
10.0.2.3.
Do this before the installer. Nothing breaks if you don’t — the daemon retries every thirty seconds and picks itself up — but an installer reporting success over a bridge that never comes up reads like a failed install when only one field is wrong.
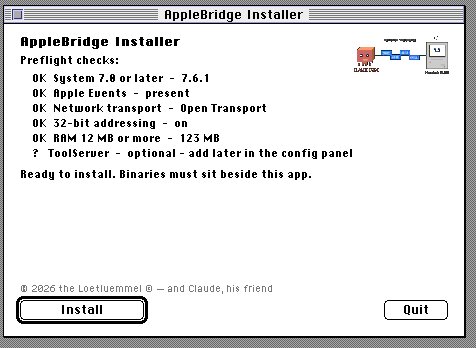
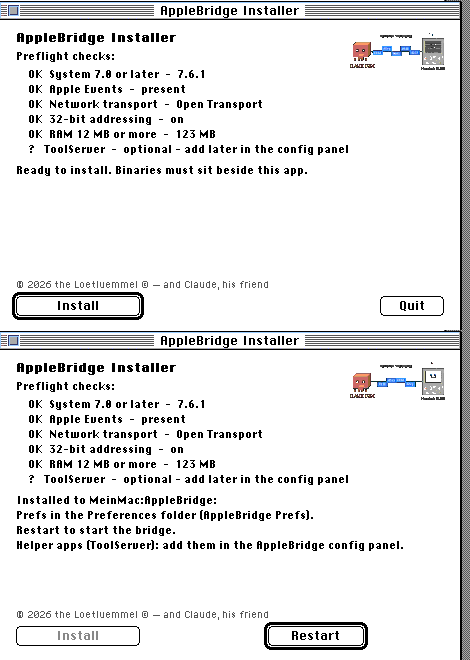
Then the installer. Open the AppleBridge Kit volume and run AppleBridgeInstaller. It preflights the machine — System version, Apple Events, network transport, 32-bit addressing, free memory — and refuses environments that cannot work rather than installing into them. Press Install, then Restart. Both are default buttons, so Return works if you prefer the keyboard; the bridge does not run until the machine has come back up, which is why Restart is the only way onward.
Both states are worth recognising before you meet them. A ? line is not a
failure: ToolServer is optional, and section 5 below adds it if you want the
command tier.
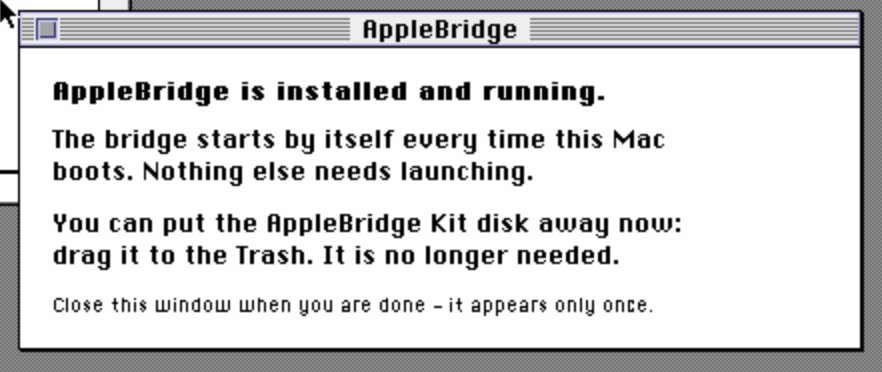
Afterwards, put the kit away. On the first boot after installing, a window
confirms the bridge is running and asks you to drag the AppleBridge Kit disk
to the Trash. To stop it coming back, delete its disk line from the emulator’s
preferences — the guest cannot do that for you.
4. Check that it came up
cd AppleBridge/host
printf 'MACSTATUS\n\n' | nc -w 5 localhost 9001
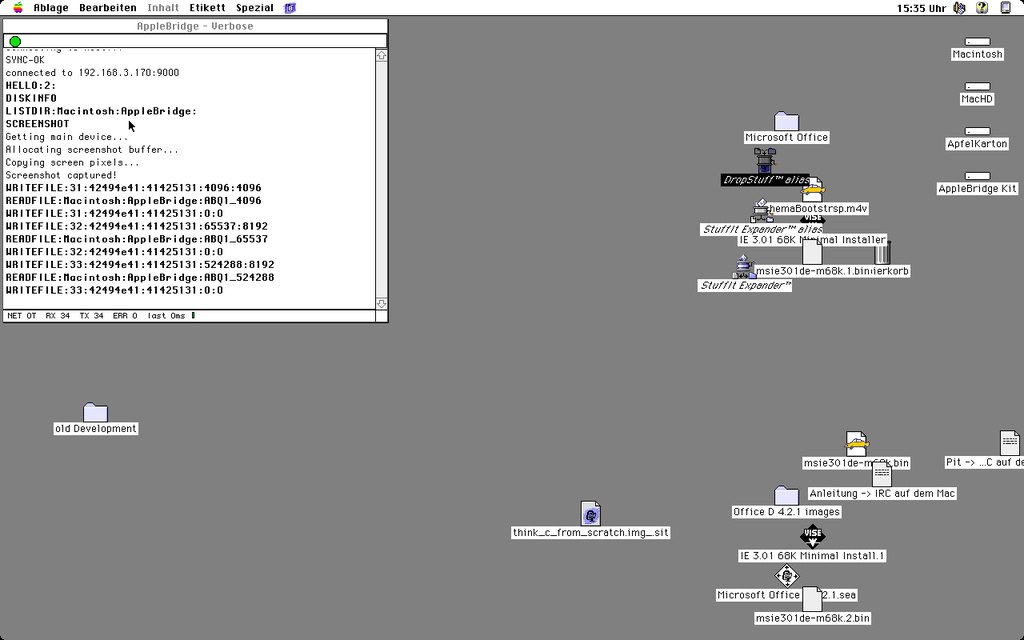
host_connected=1 and daemon_responding=1 mean the bridge is live. The guest
says so itself, in the daemon’s own console: SYNC-OK, the host it reached, and
HELLO:2 for the negotiated protocol.
If it does not come up, run the cross-layer diagnosis:
/usr/bin/python3 host/bridge_doctor.py
It checks the launchd job, the listeners, the emulator’s backend, the address the guest is configured to dial, and how those relate — and it answers even when the host server is down. Failure modes and their causes are collected in TROUBLESHOOTING.md.
5. Optional: the command tier
To run MPW commands, compile and link from the host, the guest needs MPW and ToolServer. Only ToolServer returns command output — MPW Shell executes commands but hands back empty replies, which is a genuinely confusing failure if you do not know it.
Once ToolServer is installed in the guest, add it in AppleBridgeConfig with Add Helper App…; the daemon chain-launches whatever is listed there at boot. Use real applications only — an entry that opens a full-screen window freezes the guest at startup.
Using it
From a shell, the control port speaks a small verb set: MACSTATUS, DISKINFO,
LISTDIR, screenshot, WRITEFILE, READFILE, KEY, TYPE, CLICK,
LAUNCH, SHUTDOWN.
For Claude Code there is an MCP server in mcp/, registered in .mcp.json,
exposing thirty tools across two surfaces: driving a build and reading its
output, and moving bytes, running programs, observing and interacting.
Full documentation: docs/SETUP.md for the long form, ARCHITECTURE.md for the design.
What this install was measured against
On 31 July 2026 the whole sequence above was run on a machine that had never
seen AppleBridge: a late-2013 MacBook Pro on macOS 10.15 with system Python
3.8.2, one network interface, no hfsutils and no Homebrew, and a German
System 7.5.3 guest from which every trace of AppleBridge had been stripped and
the removal confirmed by rescan.
The repository was cloned from GitHub, the kit downloaded from the release, and the guest driven entirely by keyboard. The bridge came up without anyone typing an address, and the ToolServer-less surface passed all eleven checks, including a 512 KB round trip with both forks byte-exact at roughly 246 KiB/s.